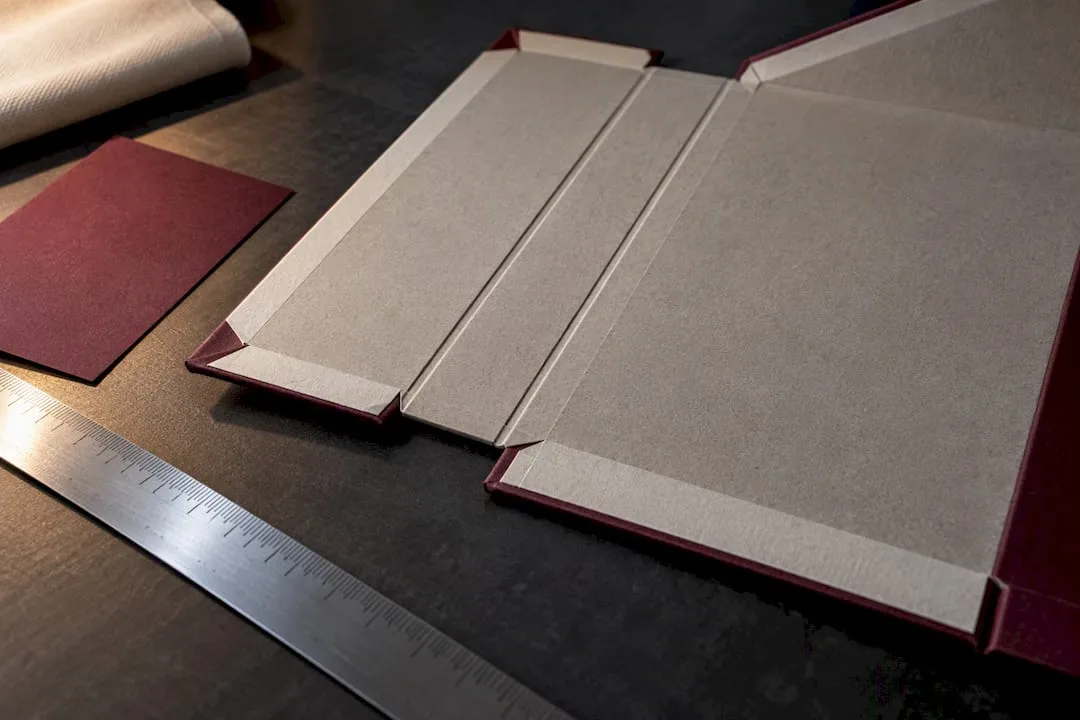
Your first goal is a dieline that folds flat, ships flat, and re-forms with a closure that engages every time. The single spec to lock before touching artwork or ordering samples is dieline accuracy paired with a 3 to 5 mm safe zone from every cut and crease line. Get that right first, then follow the workflow below.
TL;DR: Maintaining a 3 to 5 millimeter safe zone from cuts and creases is essential to prevent trimming or folding errors during production. Accurate magnet pocket placement and an N rating verified with the factory are critical to ensure proper closure alignment in the final box. Including separate layers for cut, crease, glue, varnish, and fold arrows in the dieline facilitates a smooth factory handoff and reduces costly mistakes. Softer wraps conform better to fold lines, but rigid finishes like foil stamping should be kept away from scores to prevent cracking. Prototyping with production-grade materials in the intended finish helps identify fit, closure, and durability issues before full-scale manufacturing.
Table of Contents
- Building the dieline: file setup, layers, and panel orientation
- Choosing board, wrap, and finishes that hold a fold
- Where closures belong and how they affect setup
- Tolerances, safe zones, and the mistakes that break production
- How we turn a dieline into a reliable sample
- What most dieline advice gets wrong
- Turning your dieline into a finished box with Yuan Packaging
- Where to go deeper on dielines and production rules
- FAQ
Building the dieline: file setup, layers, and panel orientation
A production-ready file starts with the basics done correctly. Set your artboard in CMYK, add a bleed of roughly 3 mm on all sides, and build your file with separate layers for cut, crease, glue, print, and varnish. Factories read these layers as instructions, not decoration, so mixing them together is one of the fastest ways to stall a job.

Panel orientation matters as much as the layer setup. Exterior artwork sits on the panels that face out once the box is assembled, and several panels invert during folding, so what looks correct flat on your screen can print upside down on the finished box if you have not checked fold direction. On magnetic closures, the front flap and the front wall are not the same panel: the flap carries the magnet pocket and often a slightly different bleed allowance, while the wall behind it holds the visible brand face.
Before you export, run through this sequence:
- Outline all fonts so nothing reflows at the factory.
- Embed or link all images at final resolution, never at screen resolution.
- Add trim, bleed, and registration marks to the print-ready PDF.
- Confirm cut, crease, and glue layers are named consistently and separated by color.
- Save a flattened preview alongside the layered file so the factory can sanity-check the layout at a glance.
When you hand the file to a factory, attach a short checklist rather than relying on the dieline alone:
- Glue-flap widths in millimeters, not just visual placement.
- Magnet pocket dimensions and position relative to the edge.
- Fold direction arrows on every score line that could be ambiguous.
- Requested sample quantity and any specific finish notes for the prototype run.
Layered dielines with clearly marked cut, crease, glue, and varnish elements remain the standard for a trouble-free handoff, and skipping any one of those layers tends to show up later as a costly surprise.
Choosing board, wrap, and finishes that hold a fold
The board you choose decides whether your box collapses cleanly or cracks at the score. Greyboard in the 1.5 to 2.5 mm range is common for collapsible rigid boxes, with thicker board giving more shelf presence but demanding a wider crease radius to fold without splitting.
Wrap material and adhesive choice shape the corners as much as the board does. A stiffer wrap resists creasing and can telegraph stress lines at the fold, while a softer wrap conforms more readily but needs a stronger adhesive bond to hold its shape through repeated flattening and setup. Wrap material, adhesive, and corner construction together determine how well a collapsible box performs over its working life, and getting this pairing wrong is a common cause of delamination at the corners.
Finishes need placement discipline. Soft-touch lamination, foil stamping, embossing, and spot UV all read beautifully on a flat proof, but any of them applied directly over a score line risks cracking the moment the box folds. Keep decorative finishes a comfortable distance from every crease and let the board itself do the folding.
- Choose board thickness based on box size and expected shelf handling, not just visual weight.
- Match wrap flexibility to your crease pattern rather than fighting a stiff wrap with more force.
- Keep foil, emboss, and spot UV off the score lines to avoid visible cracking.
- Document any FSC-certified or recycled substrate choice directly on the dieline notes for the factory.
Pro Tip: If your finish feels rigid to the touch on a swatch, ask for a slightly wider crease radius before you approve the dieline, not after the first prototype cracks.
Sustainable boards and FSC-certified papers work well in collapsible constructions, though they sometimes call for a different adhesive or extra corner reinforcement to match the durability of standard greyboard.
Where closures belong and how they affect setup
Magnet placement is the detail most likely to derail an otherwise solid dieline. Keep magnet pockets set back from the edge with enough margin to avoid interference with the fold, and specify pocket depth along with the magnet’s strength or N rating directly to the factory rather than leaving it to assumption. Magnet pockets that are dimensioned incorrectly on the dieline are a frequent cause of closures that misalign on the first sample.
Not every box needs a magnet. Tuck closures, ribbon ties, and adhesive strips all cost less to produce and assemble faster on a line, though they trade away the satisfying, deliberate close that a magnet delivers. The right choice depends on unit volume and how much of the unboxing moment your brand wants to control.
Corners and glue flaps also need a decision early: machine assembly favors pre-glued corners and consistent double-sided tape placement, while hand assembly gives more flexibility on flap width but costs more per unit at scale. Either path changes the dieline’s flap dimensions, so lock this decision before finalizing measurements.
- Set magnet pockets back from the edge and confirm N rating with the factory in writing.
- Reserve ribbon or tuck closures for lower-volume runs where hand assembly is already planned.
- Specify pre-glued corner tape placement if the box will run through machine assembly.
- On the first prototype, fold the box flat and reassemble it several times to confirm the closure still engages cleanly.
Tolerances, safe zones, and the mistakes that break production
A 3 to 5 mm safe zone from every cut and crease line protects text and key artwork from being trimmed or folded over when the board shifts slightly during press operations, which happens even on well-run lines. Ask your factory for its specific die-cut and scoring tolerance figures before finalizing dimensions, since these vary by board thickness and equipment.
Most collapsible rigid box failures trace back to a handful of repeat mistakes, and dieline handoffs that skip clearly labeled cut, crease, glue, and varnish layers sit near the top of that list. Artwork crossing a crease without extra bleed, glue flaps cut too narrow to hold a bond, and metallic finishes placed directly on a score line round out the most common errors.
- Check that no critical text or logo element sits inside the safe zone margin.
- Fold and reassemble the prototype by hand to confirm the closure engages without forcing.
- Measure the finished sample against the dieline to confirm dimensions match within the factory’s stated tolerance.
How we turn a dieline into a reliable sample
Anthony has spent years working alongside packaging designers and manufacturers to close the gap between a clean file and a box that actually performs on a shelf and in a customer’s hands. Experience in producing premium packaging for beauty, spirits, and lifestyle brands shapes how we handle every dieline that comes through our prototyping stage.
We run each sample through a structured approval loop: check the dieline against our tolerance specs, produce a prototype in production-grade board and wrap, then confirm fit and closure before locking the file. Sustainable substrate options are available at this same stage, so material trade-offs get resolved before full production, not after.
What most dieline advice gets wrong
Most guidance on collapsible rigid boxes treats the dieline as a purely technical document, a set of lines to get correct and then hand off. That framing misses the point. A dieline is a negotiation between what your brand wants the box to look like and what board, wrap, and adhesive can physically hold under repeated folding.

The conventional advice to “just add bleed and safe zones” is correct but incomplete. It rarely mentions that wrap stiffness changes how much safe zone you actually need, or that a magnet pocket placed a few millimeters off can undo an otherwise perfect file. Designers who prioritize a working prototype over a polished flat proof catch these problems early, when they cost a sample run instead of a production run.
If you take one thing from this, prioritize the physical test over the visual one. A dieline that looks correct on screen and a box that folds and closes reliably in your hand are not the same achievement, and only one of them ships.
— Anthony
Turning your dieline into a finished box with Yuan Packaging
Once your dieline is close, the fastest path to a reliable box is a direct check against production tolerances rather than another round of guesswork. Services include dieline checking, prototyping and sample runs, small-run production, premium finishing, and sustainable substrate options for collapsible rigid boxes and related packaging.
- Send us your dieline for a tolerance check before you commit to a full production order.
- Request a one-off prototype in your intended board, wrap, and closure to confirm fit and cosmetic finish.
- Ask about coordinated finishing across boxes and labels for a unified shelf presentation.
Visit our rigid gift boxes page to request a quote or start a sample order, or explore our label and finishing services if your project needs coordinated packaging across boxes and labels.
Where to go deeper on dielines and production rules
- Compare structures in rigid box vs. folding carton.
- Review hinge mechanics in book-style and door-style boxes.
FAQ
What safe zone should I use around cuts and creases?
Keep text and key artwork at least 3 to 5 mm away from every cut and crease line. This margin protects your design from board movement that happens during normal press operations.
How do I know if my magnet placement is correct?
Confirm the magnet pocket has enough margin from the edge and matches the strength or N rating agreed with your factory, then fold and reassemble the prototype several times to check the closure engages consistently. Incorrect pocket dimensions are a common cause of misaligned closures on first samples.
What layers should a collapsible rigid box dieline include?
A production-ready dieline needs separate layers for cut, crease, glue, and varnish, along with clear fold direction arrows. Supplying these layers correctly is standard practice for a smooth handoff to any factory.
Why is my finish cracking along the fold?
Finishes like foil stamping or spot UV placed directly on a score line are prone to cracking once the box folds. Keep decorative finishes a safe distance from every crease line and let the board handle the fold itself.
Should I prototype before ordering a full production run?
Yes, prototyping with the exact board, wrap, magnets, and finish you intend to use in production is the most reliable way to catch fit and cosmetic issues early. A small sample run and dieline check typically costs far less than reworking an entire production order after the fact.