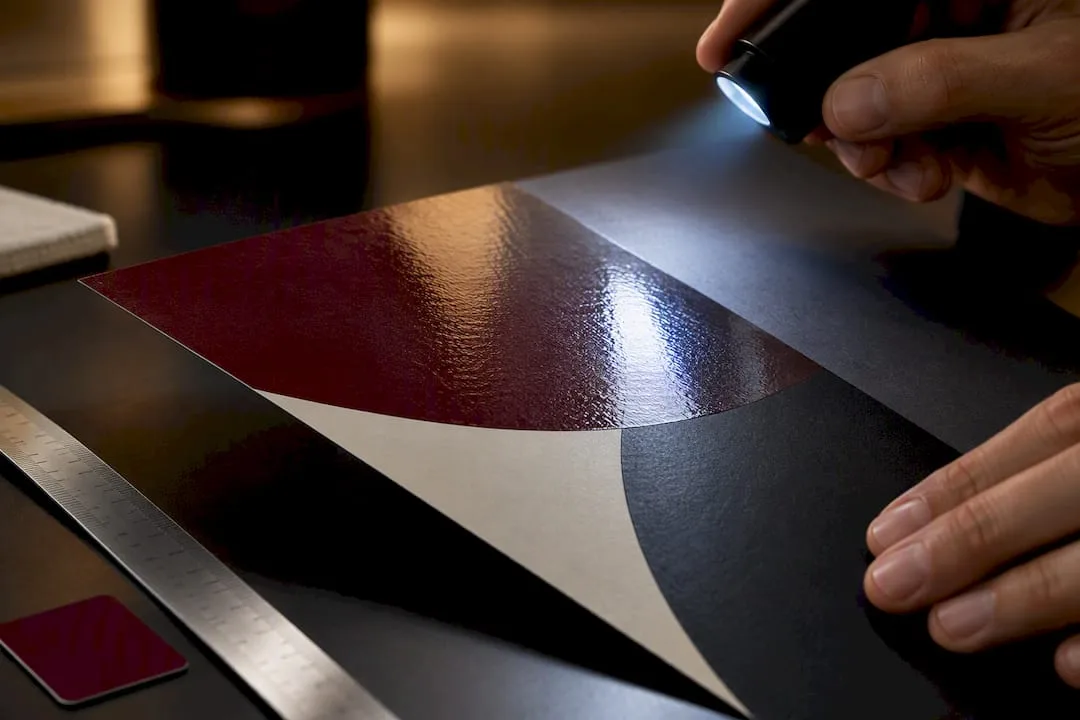
Spot UV printing applies a clear, glossy varnish to specific areas of a printed piece after the ink dries, creating sharp contrast against a matte or uncoated surface. It’s a finishing step, not a printing method, and it works best when confined to logos, headlines, or icons rather than spread across the whole design. Reach for it when you want business cards, packaging, or covers to feel tactile and premium without redesigning the artwork.
TL;DR: Spot UV coating should be limited to around 25 percent of the surface to maintain contrast and avoid visual flattening or looks of cheapness. Precise registration between print and varnish is essential, so requesting a physical proof helps prevent misalignment, especially with fine details or thin borders. Coated stocks at approximately 175 gsm or heavier are recommended for reliable results, while porous or uncoated materials can dull the gloss contrast. Using digital varnish heads makes raised and textured spot UV more accessible for small runs and prototypes, reducing setup costs compared to screen methods. Spot UV offers a cost-effective alternative to embossing or foil stamping, providing a sleek gloss contrast in a variety of premium packaging applications.
Table of Contents
- What Is Spot UV Printing, and How Does It Differ From Flood UV?
- How Does the Spot UV Production Process Work?
- How Do You Set Up Files for Spot UV Masks?
- What Materials Work Best With Spot UV Coating?
- When Should You Use Spot UV, and What Are the Trade-Offs?
- Manufacturer-Tested Tips for Specifying Spot UV
- What Environmental Impact Does Spot UV Printing Have?
- How Does Spot UV Compare to Embossing and Foil Stamping?
- Restraint Is What Makes Spot UV Work
- Get Spot UV Finishing on Your Next Packaging Run
- Sources
- FAQ
What Is Spot UV Printing, and How Does It Differ From Flood UV?
Spot UV is a selective coating: a clear, UV-cured varnish applied only to chosen areas of an already-printed sheet, producing a gloss-versus-matte contrast that catches light and draws the eye to specific elements. Flood UV, by contrast, coats the entire surface, and UV printing (direct) uses UV-curable ink as the printing method itself rather than a finish layered on top.
Within Spot UV, you’ll find several variants worth knowing by name. Flat gloss Spot UV sits level with the surrounding stock and simply shines. Matte spot UV inverts the effect, adding a satin highlight over a glossy base. Soft-touch spot UV pairs a velvety laminate with glossy accents for a two-texture feel. Raised, or 3D, Spot UV builds tactile height through heavier varnish passes, and it’s typically pricier than flat spot UV but still cheaper than embossing or foil stamping. Pearlescent spot UV adds a shifting shimmer. Each variant earns its cost by making one detail feel deliberate against a calmer background, which is exactly why the contrast reads as luxury rather than decoration.
How Does the Spot UV Production Process Work?
Production starts with the base print, which may then receive lamination before the varnish pass. Once that surface is ready, the sheet runs through either a traditional screen press or a digital varnish head, both of which apply the UV-curable coating only where the mask dictates.
Screen-based coating suits large-volume runs and delivers dense, durable builds, but setup costs and lead times run higher. Digital varnish heads flip that equation: lower setup costs, practical short runs, and the ability to produce raised or 3D effects without commissioning a screen. That shift has made raised spot UV realistic for prototyping and small brand orders, not just mass production.
After application, UV lamps cure the varnish almost instantly, locking in the gloss. Registration between the printed image and the varnish mask has to be precise. Even a slight shift can leave a visible sliver of misaligned gloss along an edge. That’s why reputable print partners insist on a physical proof before a full run. A monitor preview cannot show you how light bounces off cured varnish, and lead times for Spot UV jobs typically run longer than standard printing because of that extra pass and cure cycle.

How Do You Set Up Files for Spot UV Masks?
Your Spot UV layer is a separate file element that tells the press exactly where varnish goes, and it has to follow rules that differ from standard artwork.
- Build a dedicated Spot UV layer in vector software like Adobe Illustrator or InDesign; raster art under 300 DPI risks jagged, soft edges on cured varnish.
- Fill mask shapes with a named spot color or 100% K black, and set that layer to overprint so it doesn’t knock out the printing beneath it.
- Avoid gradients, tints, or screened values in the mask. The press reads it as solid on or solid off, nothing in between.
- Keep type in the mask no smaller than 8 to 10 points, and strokes no thinner than roughly 0.5 point, since finer detail tends to blur or fill in during curing.
- Build in registration tolerance of about 0.5 to 1 millimeter around small elements, since that’s the realistic shift you can expect between print and varnish passes.
- Always request a physical mockup or wet proof before committing to a full run, especially for registration-critical designs like fine text or thin borders.
Pro Tip: Design your Spot UV mask as if you’re drawing with a thick marker, not a fine pen. Chunky, deliberate shapes survive the press; delicate line work rarely does.
What Materials Work Best With Spot UV Coating?
Spot UV shows up most clearly over matte or soft-touch laminate, where the surrounding surface stays flat and light diffuses evenly, making the glossy areas pop by comparison. A soft-touch laminate paired with spot UV highlights is one of the more reliable combinations for packaging that needs to feel expensive off the shelf.
Uncoated or highly porous stocks work against you here. They absorb varnish rather than letting it sit on the surface, which dulls the contrast you’re paying for. Most print partners recommend a coated stock at roughly 175 gsm or heavier for dependable results. Raised UV needs extra clearance around adjacent elements too, since the varnish spreads slightly as it builds height, so tight layouts benefit from a little breathing room. If your substrate is naturally rough, textured, or destined for heavy handling outdoors, direct UV printing may serve you better than a spot finish applied after the fact.
When Should You Use Spot UV, and What Are the Trade-Offs?
Spot UV shows up most often on business cards, rigid packaging, book covers, invitations, and labels, anywhere a brand wants one detail to feel more considered than the rest of the piece.
The benefits are straightforward: crisp gloss contrast, a tactile cue that customers notice before they read a word, and a perceived bump in production value that’s disproportionate to its actual cost. It also offers a thin layer of surface protection over the varnished area itself.
The risks are real, too:
- Misregistration between print and varnish, especially on tight layouts.
- Orange-peel texture when varnish viscosity or curing settings are off.
- Delamination if the laminate and varnish aren’t a matched pair.
- Added lead time and cost from the extra production pass.
The fix for most of these issues is restraint. Keeping coverage low, often cited around 25 percent of the surface, preserves the contrast that makes Spot UV worth specifying in the first place.
Manufacturer-Tested Tips for Specifying Spot UV
Request a wet proof or physical sample any time your artwork includes fine type, thin borders, or elements sitting close to the registration tolerance. A screen preview won’t reveal how light behaves on cured varnish, and it won’t catch a mask that’s drifted half a millimeter off target.
When briefing a supplier, spell out three things clearly: the laminate you want underneath, whether you need flat or raised UV, and the tolerance you can accept around small details. Ask for the laminate’s material specification, too, since not every soft-touch or matte film cures cleanly with every varnish formula. If sustainability matters to your brand, confirm the laminate is recyclable or compatible with standard recycling streams before locking in the finish.
What Environmental Impact Does Spot UV Printing Have?
UV-cured varnish uses light rather than heat or solvent evaporation to set, which cuts down on the volatile organic compounds that traditional oil-based coatings release into the air during curing. That’s a genuine advantage over older gloss-finishing methods, and it’s one reason UV coatings have become the standard choice for brands paying attention to shop-floor air quality and energy use.
Recyclability is more nuanced. A spot UV coating itself is a thin, cured layer that generally doesn’t block recycling the way a laminate film can, but the laminate you pair it with matters more than the varnish. Soft-touch and matte films vary in how cleanly they separate from paper fiber during repulping, so a coated, laminated package isn’t automatically as recyclable as an uncoated one. If recyclability is a priority for your packaging, ask your supplier directly which laminate and varnish combination is compatible with standard paper recycling streams rather than assuming any UV finish qualifies.
The other consideration is waste from misregistration and reruns. Because Spot UV requires precise alignment between the print pass and the varnish pass, a poorly prepared file or an unproofed run increases scrap rates, and scrapped substrate carries its own material and energy cost. Investing in a proper proof upfront isn’t just a quality safeguard. It’s a modest sustainability decision, since it reduces the odds of reprinting an entire batch over an avoidable registration error.

How Does Spot UV Compare to Embossing and Foil Stamping?
Spot UV, embossing, and foil stamping all signal premium production, but they create that impression through different mechanics, and they’re not interchangeable.
Embossing raises the substrate itself using pressure and a die, producing a three-dimensional texture you can feel with your eyes closed. It adds no color or gloss on its own, though it’s often combined with foil or ink for a layered effect. The tooling cost is higher than Spot UV’s, and it demands a heavier stock to hold the impression without cracking.
Foil stamping applies a thin layer of metallic or pigmented film using heat and pressure, delivering a reflective finish that Spot UV can’t quite replicate since UV varnish is clear rather than colored. Foil reads as more formal and expensive, largely because die-based tooling and metallic film both cost more than a varnish pass.
Raised Spot UV lands in between these two. It offers a tactile bump similar to light embossing, and it typically costs less than either embossing or foil because it doesn’t require a custom die. Flat Spot UV, meanwhile, is the fastest and least expensive of the three techniques when the goal is simply gloss contrast rather than texture or metallic shine. Choosing among them comes down to what you’re trying to signal. Foil says “formal and luxurious,” embossing says “tactile and structural,” and Spot UV says “clean and modern,” often at a fraction of the tooling investment the other two require.
Restraint Is What Makes Spot UV Work
Designers reach for heavy Spot UV coverage assuming more gloss reads as more luxury. The opposite tends to hold. A few restrained highlights on a logo or a single icon draw the eye and read as intentional, where blanket coverage flattens into visual noise and can look cheap once light hits it wrong. That restraint is where shelf presence actually improves. Yuan Packaging’s finishing capabilities exist precisely to help brands find that one focal point worth highlighting instead of coating everything and hoping it lands.
— Anthony
Get Spot UV Finishing on Your Next Packaging Run
Spot UV, soft-touch lamination, foil stamping, and raised varnish effects can be integrated directly into custom labels, rigid gift boxes, and carrier bags, allowing specification of a finish with production tolerances from manufacturers experienced in these processes. That matters more than it sounds, because a supplier who treats spot UV as a checkbox option rather than a controlled process is exactly where misregistration and orange-peel texture creep in.
If you’re specifying spot UV for a product launch, start with the custom label line if you need pressure-sensitive labels with varnish accents, or the rigid gift box range for packaging that needs to feel substantial off the shelf. Either way, request a physical proof before committing to a full run. It’s the single fastest way to catch a registration issue before it becomes a reprint.
Sources
- Spot UV | Print Wiki
- What Is Spot UV Printing? How It Works, File Setup, Uses and UV Printers - OMTech
- Spot UV Printing Explained: Uses, Benefits, and How It Works
- Spot UV Coating Explained: Gloss Where It Counts
FAQ
What Is Spot UV on Printing?
Spot UV is a clear, glossy varnish applied only to specific areas of a printed piece after the base print is finished, creating a raised or flat gloss contrast against the surrounding matte surface. It’s a finishing technique layered on top of printed artwork, not a printing method itself, and it’s most often used to highlight a logo, headline, or icon.
Is Spot UV Worth It?
For premium packaging, business cards, and book covers where you want one element to stand out, yes, since the contrast it creates reads as considered and expensive with a relatively modest cost increase. It’s less worth it on budget print runs or designs with dense, detailed artwork, where the added lead time and misregistration risk outweigh the visual payoff.
What Are the Downsides of UV Printing?
The main production risks are misregistration between the print and varnish passes, orange-peel texture from incorrect varnish viscosity, and delamination when the laminate and varnish aren’t matched properly. It also adds an extra production pass, which increases both cost and lead time compared to standard printing.
What Is the Difference Between Raised Spot UV and Flat Spot UV?
Flat spot UV sits level with the printed surface and creates gloss contrast without added height, while raised spot UV builds tactile dimension through multiple or heavier varnish passes. Raised spot UV costs more than flat spot UV but remains less expensive than embossing or foil stamping for a similar tactile effect.