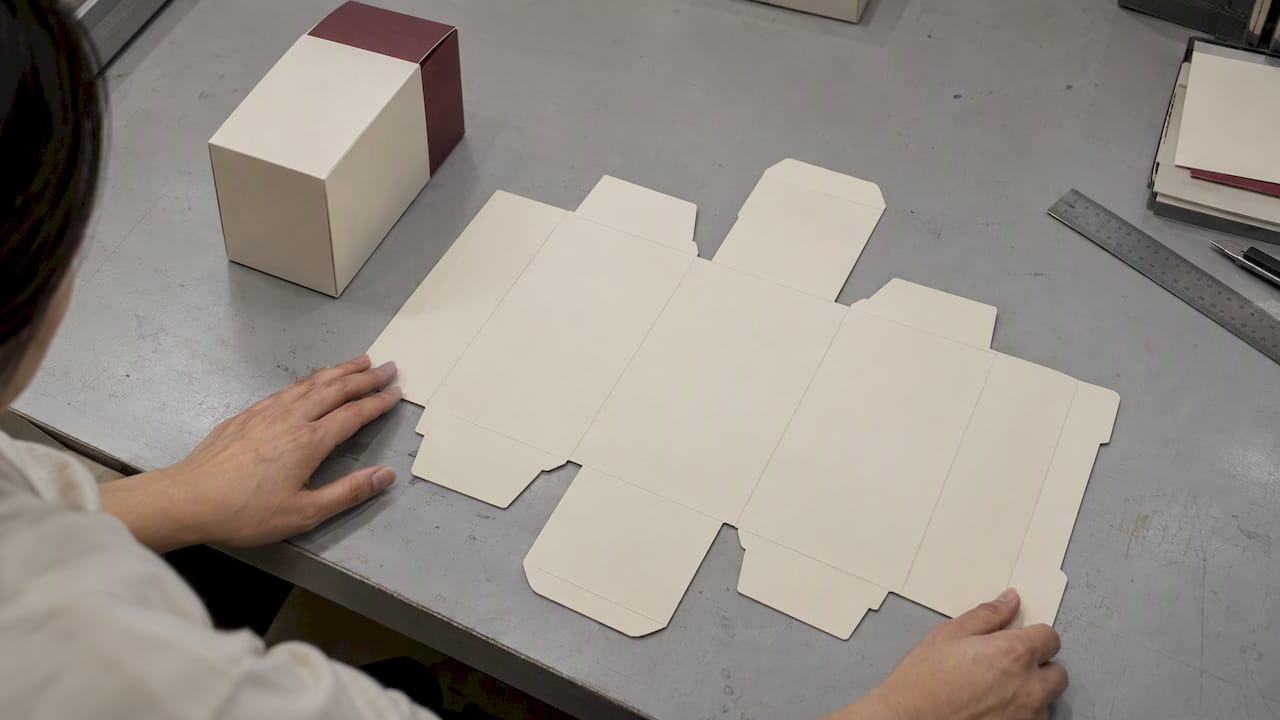
A carton dieline is the flat, scaled blueprint of a box: the cut lines, crease lines and glue areas that turn one sheet of board into a finished carton. The reliable way to get one is to build it from your product's dimensions or request it from the manufacturer who will produce the carton. Then place your artwork on it without changing it, and approve it only after a physical proof. This guide covers all three steps, plus the mistakes that most often delay a run.
TL;DR
- A dieline shows where the board is cut, creased and glued. It is the base layer of every packaging artwork file.
- Build it from the space your product needs, the carton structure, the dimension convention and the board caliper, then check the flat and folded views.
- Ask the carton manufacturer for its 1:1 vector dieline before you design. Do not redraw or resize it.
- Keep text and graphics at least 3 mm from cut and crease lines, add 3 mm of bleed, use CMYK or spot colors, and embed or outline fonts.
- Approve a physical proof before production, not only a PDF.
Table of Contents
- What a carton dieline shows
- Common carton styles and how their dielines differ
- How to create a dieline for your product's dimensions
- Where to get a packaging dieline template
- Preparing artwork on the dieline
- Dieline mistakes to check before approving a file
- Our perspective
- Working from your manufacturer's dieline
- FAQ
- Sources
What a carton dieline shows
Think of a dieline as the pattern a tailor cuts before any cloth is sewn. It describes the flat shape of the carton so that the cutting die, the creasing rules and the gluing line can all be made from the same drawing. In short, it is a blueprint that shows cut lines, fold lines and glue areas.
A working carton dieline normally carries these elements:
- Cut lines, where the die slices through the board and defines the outer silhouette, tabs and any windows or thumb notches.
- Crease (score) lines, where the board folds. Their position depends on board thickness, which is why the same carton drawn for two different boards is not interchangeable.
- Glue areas, the flaps where adhesive is applied, which must stay free of varnish, lamination and ink.
- Trim and bleed, the margin beyond the cut line that your artwork must fill so that a small cutting shift does not reveal unprinted board.
- Safe zone, the inner margin where text, logos and regulatory marks should stay.
- Panel labels and orientation, so you know which panel is front, back, top, bottom and which way the grain or print direction runs.
On a premium project the dieline also becomes the map for finishes: foil stamping, embossing, spot UV and soft-touch lamination are each placed on their own layer and registered to the same cut lines.
Common carton styles and how their dielines differ
Most folding cartons are variations on a handful of structures. The dieline tells you at a glance which one you are dealing with, and each has its own checks.
| Style | What the dieline looks like | What to check |
|---|---|---|
| Straight tuck end | Top and bottom tuck flaps hinged from the same panel | Tuck flap depth and a small tuck radius so the closure sits flat |
| Reverse tuck end | Top and bottom tuck flaps hinged from opposite panels | Artwork orientation: top and bottom panels read in opposite directions on the flat sheet |
| Auto-lock (crash lock) bottom | Interlocking bottom panels that fold flat and snap open | Glue seam position and how the bottom panels overlap |
| Sleeve or tray with sleeve | A flat tube plus a separate tray blank | Clearance between tray and sleeve so the pair slides smoothly |
| Hinged lid | A body and lid joined by a crease line | Hinge crease position and board caliper allowance |
| Pharmaceutical carton | Tuck-end structure sized for the folded leaflet, with panels reserved for Braille and codes | Space for mandatory text, tamper-evident features and clear varnish-free zones |
If you are choosing between structures, our page on tuck-end cartons shows the most common closure in detail, and our overview of custom folding cartons covers the wider range. Corrugated shipping boxes use their own style codes, the FEFCO system rather than the ECMA code used for folding cartons; our guide to corrugated box design, FEFCO styles and flutes explains that system.
Rigid boxes are a different construction altogether, with thick board wrapped in a printed sheet rather than folded paperboard. Their dielines are covered in our rigid box design guide, and collapsible versions need their own tolerances, described in our piece on safe zones for collapsible rigid box dielines.
How to create a dieline for your product's dimensions
The steps are broadly the same whether you use a generator, a template library or a manufacturer's design team. A typical dieline generator follows this sequence: choose the structure, enter the product dimensions, select the board, inspect the flat and folded views, then export for supplier review.
- Measure the product, not the box. Record the length, width and height of the item as it will sit in the carton, including any inner tray, insert or cap that adds volume. A cosmetic bottle with a pump needs its full height with the pump on.
- Choose the structure. Decide on tuck end, auto-lock, sleeve or another style based on how the carton is filled, shipped and displayed.
- Set the dimension convention. Cartons can be specified by inside, outside or fold-center (crease-to-crease) dimensions, and by different orders of length, width and height. Confirm which convention your template or supplier uses before you enter any numbers. A mismatch here produces a carton of the wrong size.
- Select the board. Board caliper (thickness) affects score positions and the outside size of the finished carton, so choose the material before you finalize the dieline, not after.
- Compare the flat and folded views. The flat blank shows panel proportions and flap sizes. The folded preview shows whether the product fits and whether the closure works.
- Export and send for supplier review. The manufacturer then confirms that the structure runs on its equipment and adjusts for its die-making and gluing tolerances.
Pro tip: leave a small, deliberate clearance around the product rather than sizing the carton to its exact measurements. Coatings, laminates and normal variation in filling all add a fraction of a millimeter, and a carton with no clearance is the one that jams on the packing line.
What is a standard carton size?
There is no single standard size for a carton. Stock sizes exist for common formats, but a printed premium carton is almost always sized to the product. The reliable starting point is the space the product needs, then the structure, the dimension convention and the board, with the folded result checked at the end. If a template library offers a size close to yours, treat it as a starting point and adjust.

Where to get a packaging dieline template
There are three practical sources, and they suit different stages of a project.
- Online dieline generators and template libraries. These let you enter dimensions and download a vector file. They are useful for early concept work, quick mockups and checking whether a structure suits your product.
- Stock marketplaces. Image libraries sell editable outlines, often for mockups. Check that the file is true vector and drawn to scale before you rely on it for anything beyond a visual.
- Your manufacturer. This is the source that matters for production. The ECMA Technical Guidelines on creating and exchanging artwork files ask you to request the 1:1 digital die-line from the folding box manufacturer before creating artwork files. ECMA's guidelines were published in April 2016 and remain a practical reference for how designers and carton makers exchange files.
A generic template can look identical to the factory's drawing and still differ by a millimeter in a tuck depth or a glue flap. Those differences are invisible on screen and obvious on a finished carton. Use a generic template to design, and swap in the manufacturer's file before you finalize.
How to check that a template fits your carton
Before you commit artwork to any template:
- Look at the flat blank and the folded preview together.
- Confirm the dimension convention (inside, outside or fold-center) matches your measurements.
- Confirm the board thickness assumed by the template matches the board you will order.
- Make a physical proof, a plain white cut-and-folded sample, and put the real product in it.
A white sample costs little compared with a full production run, and it reveals problems no screen can: a lid that binds, a product that rattles, a closure that will not stay shut.
Preparing artwork on the dieline
Once the dieline is confirmed, the artwork goes on top of it. The ECMA guidelines set out the main rules, and they match what most carton printers ask for:
- Use the manufacturer's unchanged 1:1 vector dieline, placed on its own processing layer. Never scale, redraw or "tidy" it.
- Keep text and graphics at least 3 mm away from cut and crease lines, and extend the artwork 3 mm beyond the cut (bleed). The ECMA minimum is 2 mm for both; we ask for 3 mm.
- Deliver fonts embedded or converted to paths, so that nothing substitutes when the file opens elsewhere.
- Specify color as Pantone, HKS or CMYK, never RGB. Half-tone images should be 300 DPI.
Apart from our 3 mm margins, those rules are the ECMA technical recommendations. If another plant prints your cartons, confirm the figures against its specification, since some plants set stricter margins for particular finishes.
For a fuller walk-through of layers, color and file formats, see our artwork preparation guide for custom printed packaging.
Layers worth separating
Name and separate layers clearly so the prepress team can read the file at a glance:
- Dieline (cut, crease and glue, each in a distinct color or stroke)
- Artwork (print colors)
- Finishes (foil, emboss or deboss, spot UV, each on its own layer)
- Notes (barcode position, legal text, varnish-free zones)
Mark finishes as separate spot colors or layers instead of describing them in an email. A foil area that is only described in text is a foil area that is easy to miss.
Dieline mistakes to check before approving a file
These are the errors that most often cause a proof to come back with corrections or, worse, a run to stop. Use them as a checklist before you sign off.
| Mistake | Why it matters | Fix |
|---|---|---|
| Edited or resized dieline | Cut and crease positions no longer match the tooling | Use the manufacturer's 1:1 file unchanged |
| Text or logos near folds | Creasing and cutting shift content slightly | Keep at least 3 mm clear of cut and crease lines |
| No bleed | A tiny cutting shift shows unprinted board at the edge | Extend background art 3 mm beyond the cut |
| RGB images or colors | Colors shift in conversion | Work in CMYK or named spot colors |
| Fonts not embedded or outlined | Text reflows or swaps on another computer | Embed fonts or convert text to paths |
| Low-resolution images | Soft, pixelated print | Use 300 DPI for half-tone images |
| Ink or varnish on glue flaps | The adhesive cannot bond | Mark glue areas as varnish-free |
| Upside-down panels | Reverse tuck cartons flip the top and bottom panels | Check orientation on the flat and on a folded proof |
| Board caliper ignored | Outside size and score positions are off | Fix the board before finalizing the dieline |
| Approving a PDF only | Fit and closure problems stay hidden | Approve a physical proof |
A regulated product adds more to the list. For pharmaceuticals, leave room for Braille, leaflets and codes in the structure, not as an afterthought; our guide to pharmaceutical carton requirements explains what the panel layout needs to hold, and our tamper-evident cartons page shows how seals are built into the structure.
Our perspective
Most dieline problems we see are not design problems. They are sequencing problems. A team falls in love with a layout drawn on a generic template, then discovers late that the board, the finish or the glue flap changes the geometry.
Our approach is to bring structure, material and finish into the same conversation from the first file. Because we combine hand-finishing craft with automated manufacturing in a single facility, the person who advises on a foil area or an embossed panel works alongside the people who will cut and fold the carton. That keeps the dieline, the finish and the proof consistent from one round to the next.
Our advice to brand and procurement managers is simple: ask for the factory dieline before the creative brief is finished, treat the white sample as part of the design, and keep every finish on its own layer. It costs a day early on and often saves weeks later.
Anthony
Working from your manufacturer's dieline
If you are planning a carton for beauty, spirits, health or food, we draw a production dieline in-house for your chosen structure and board, then review your artwork against it before anything goes to press. A dieline on its own, without a sample, is charged; order a sample and the dieline is included, and the sample and dieline cost is credited against your bulk order. Checking print-ready files is free, and our design services page explains how dielines, file checks and design are handled. Our team makes cartons in many structures, from tuck-end and auto-lock to pharmaceutical cartons with tamper-evident features, and can advise on foil stamping, embossing and soft-touch lamination while the dieline is still open to change.
Browse custom folding cartons, or see the full range on our products page and send us your product dimensions to start. If you are still deciding between a folding paperboard carton and a wrapped one, our comparison of a rigid box versus a folding carton lays out the trade-offs.
FAQ
What is the difference between a dieline and a regular design layout?
A design layout shows how the artwork looks. A dieline shows how the board is physically cut, creased and glued. The artwork is placed on top of the dieline so that every graphic lines up with a real fold, panel and edge.
Can I use a free dieline template for production?
You can use one to design and to test a concept, but the file your printer needs is the manufacturer's own 1:1 vector dieline. Small differences in tuck depth, glue flap size and score positions are common between sources. Swap in the factory file before the artwork is finalized.
What file format should a dieline be in?
Vector, at 1:1 scale, on its own layer, which is the standard the ECMA guidelines describe. Keep it unchanged, and put your artwork and finishes on separate layers above it.
Do I need a physical sample before production?
Yes. A cut-and-folded white sample checks fit, closure and proportions with the real product inside. It is the step that catches what a PDF proof cannot, and it is much cheaper than correcting a finished run.
How much space should I leave between artwork and the folds?
Keep text and graphics at least 3 mm from cut and crease lines, and extend background art 3 mm beyond the cut (bleed). That is what we ask for; the ECMA guidelines give 2 mm as the minimum for both. Other printers may ask for more on specific finishes, so confirm with them.
Sources
Recommended
- 3–5 mm Safe Zones for Collapsible Rigid Box Dielines for Designers
- How to Prepare Artwork for Custom Printed Packaging
- Rigid Box Design: Dielines, Materials & Production Rules
What is the difference between a dieline and a regular design layout?
A design layout shows how the artwork looks. A dieline shows how the board is physically cut, creased and glued. The artwork is placed on top of the dieline so that every graphic lines up with a real fold, panel and edge.
Can I use a free dieline template for production?
You can use one to design and to test a concept, but the file your printer needs is the manufacturer's own 1:1 vector dieline. Small differences in tuck depth, glue flap size and score positions are common between sources. Swap in the factory file before the artwork is finalized.
What file format should a dieline be in?
Vector, at 1:1 scale, on its own layer, which is the standard the ECMA guidelines describe. Keep it unchanged, and put your artwork and finishes on separate layers above it.
Do I need a physical sample before production?
Yes. A cut-and-folded white sample checks fit, closure and proportions with the real product inside. It is the step that catches what a PDF proof cannot, and it is much cheaper than correcting a finished run.
How much space should I leave between artwork and the folds?
Keep text and graphics at least 3 mm from cut and crease lines, and extend background art 3 mm beyond the cut (bleed). That is what we ask for; the ECMA guidelines give 2 mm as the minimum for both. Other printers may ask for more on specific finishes, so confirm with them.